DIY Christmas Centerpiece
Are you looking for a great Christmas centerpiece idea? Do you want to entertain your guests in style this Christmas season? Here is an idea for a centerpiece using berried ivy, red roses and blue pine.
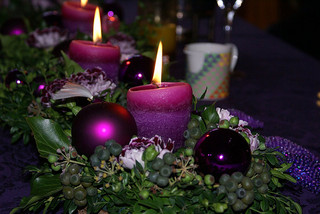
Amazing DIY Christmas Centerpiece
Stuff Required:
- 16.5 cm diameter saucer
- Half of a brick of florist’s foam that is damp
- Scissors
- Oasis tape
- A knife
- Stub wire
- Ribbon
- A tall candle
- Lurex cord
- Eight small branches of 25 centimeters long blue pine
- Nine fir cones of small to medium size
- Twelve sprigs of berried ivy
- Eight grand prix roses
- Nine 30 centimeters long cinnamon sticks
- Nine small shiny apples
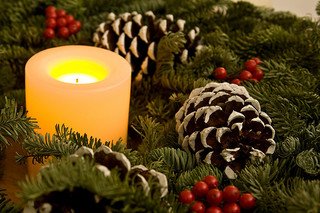
Simple Christmas Centerpiece
Step-by-step Procedure to make Christmas Centerpiece
Step 1: Place the florist foam on the saucer and strap it to the saucer with the help of the oasis tape. Strap the corners of the foam so that there enough space for fixing the candle. The oasis tape sticks when it is wet. Place the candle in the middle of the foam and push it down by about four centimeters.
Step 2: Decorate the oasis using the eight small branches of blue pine or red fir with three centimeters of the needles at the end each branch removed either using scissors or hand. Insert two of the blue pine branches horizontally and parallel to the saucer on two adjacent sides of the oasis. Then place the second blue pine layer at an angle of 45 degrees on the other two sides and on top of the florists’ foam.
The blue pine branches should never be placed close to the candle top as it can catch fire. Use the rest of the branches and cover the entire oasis.
Step 3: Insert the berried ivy into the oasis in the space available between the blue pine branches. Stick the branches in such a way that all foliage radiate out. The larger sprigs should be placed at the bottom. Check and fill if there are any gaps.
Step 4: Wrap the stub wire at a pinecone’s midpoint and feed wire through the teeth. Then twist the wires so as to leave two prongs. Wire three cones like this and bunch them together. All the wires can then be twisted together to form one piece. Cut off any wires that are more than ten centimeters in length. You can now fix the cone bunches made like this at equal intervals on the florist’s foam.
Step 5: Use the lurex cord to make bundles of cinnamon sticks, each having three sticks. The cord should be fed between the sticks as well as around two to three times in order to properly secure a bundle. Tie the cord in such as way that it forms a bow. Now, you can use the stub wire and pass it through the cord on the opposite side of the bow. Twist the stub wire three times and leave two prongs. The wires shall be cut to eight centimeters length and one cinnamon bundle can be placed along with each bunch of cones.
Step 6: Pass one stub wire through each apple and then pull the ends together to twist twice or thrice, leaving two prongs. When wiring the apples, make sure that some of them should be showing the bottom part of the fruit and some of them should show the top part of the fruit. After wiring the apples, you can place three apples around each cone bunch.
Step 7: Cut the stems of the roses at an angle using the scissors and split them vertically to about twenty centimeters. Remove all the leaves and thorns and fix them in groups of three near each of the pine cones. If you want to place the roses on top of the oasis, reduce the length of the stem of the rose. Arrange the roses in such a way that they are seen clearly in the arrangement.
Step 8: Use the ribbon to make a double loop and tie it using a piece of the stub wire. You can three bows like this and place one each on opposite sides of the centerpiece and the remaining one at the candle’s base.
Step 9: You can now place the christmas centerpiece in position and the guest of honor can be asked to light the candle.
Your DIY Christmas Centerpiece is ready!
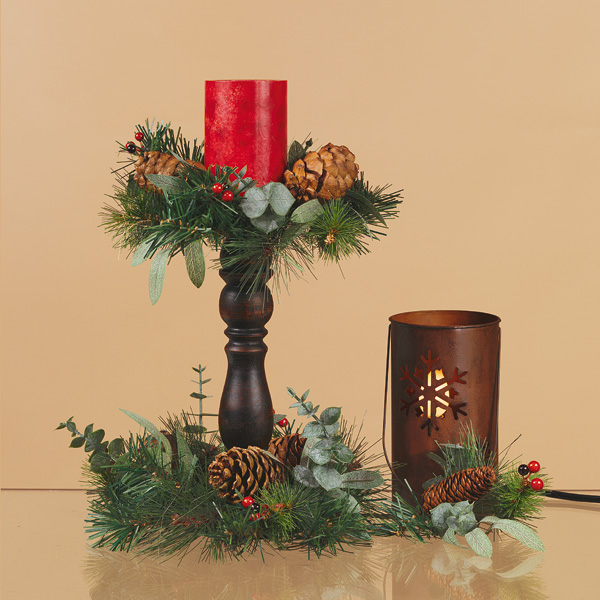
Wooden Pedestal Red Candle Ring Pine Cone Candleholder


Comments are closed.