DIY Glowing Globe Light Tutorial
If you want to enjoy a wonderful sight around your home with big, glowing and lovely-looking globe lights brightening your nights, then look no further and get right into this simple, yet greatly rewarding DIY project. It will take a few things and some effort, but you will have a nice and fully-functional light fixture for any room where it fits, depending on your choices. Before we begin however, you will need a few things to get things done:
- Drywall tape in any color you want
- A children’s ball
- Mod Podge
- A sponge brush
- Trash bag
- Pencil
- Plastic Cup
- Box cutter or any other sharp knife
- A drill
- Light cord
DIY Glowing Globe Light Tutorial
Procedure
Step 1:
Begin by wrapping the ball with the drywall tape, making sure you have the sticky side of it on the outside. You will have to do quite a few layers and it will be difficult, but make sure you have completely hidden the ball once you’re done. The really tiny holes in the tape will allow light to shine through when you’re done.
Step 2:
Wrap a trash bag over the work surface and stick it to the tape, making sure its tight and then use a foam brush to apply the Mod Podge over the surface of the ball. If its too hard you may use your hands too, just remember you will have dried glue all over your fingers for a while, so the brush may be the cleaner alternative. Keep in mind you will need quite a bit of glue to get it done, so be prepared to use a lot.
Step 3:
You have to wait for about 48 hours before moving on to this step. Take a plastic cup and use it to trace a hole on the bottom of the ball, as this will allow you to change the light bulb when it burns out. Trace the circle with care, then pop it in and then pull it out of the ball.
Step 4:
Now you will need to use the drill to punch a hole on top of the ball so your light cord will go through it. Once you insert the cord and install the light, you will have a gap on top. You can fix it with some more drywall tape and Mod Podge if you need to. Let it dry out for 24 hours and it will be ready to install and use. Make sure you always use LED light bulbs, as they will not produce heat that would otherwise be a problem in this type of design.
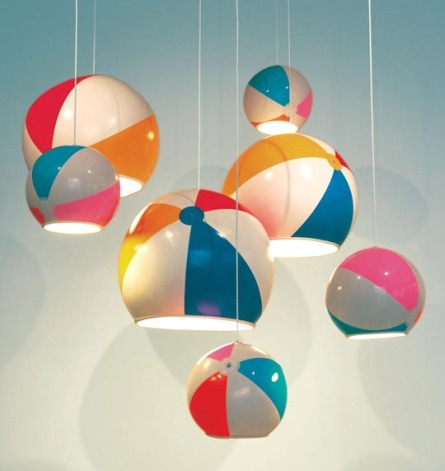
Now that the project is finally done, you will have a chance to enjoy your very own glowing ball light in any room of your home. The project is relatively easy to deal with and it doesn’t require too much work to create, so you can repeat it for the rest of your rooms if you feel the style is to your liking.
The article is sponsored by www.londonremovals.co


Comments are closed.