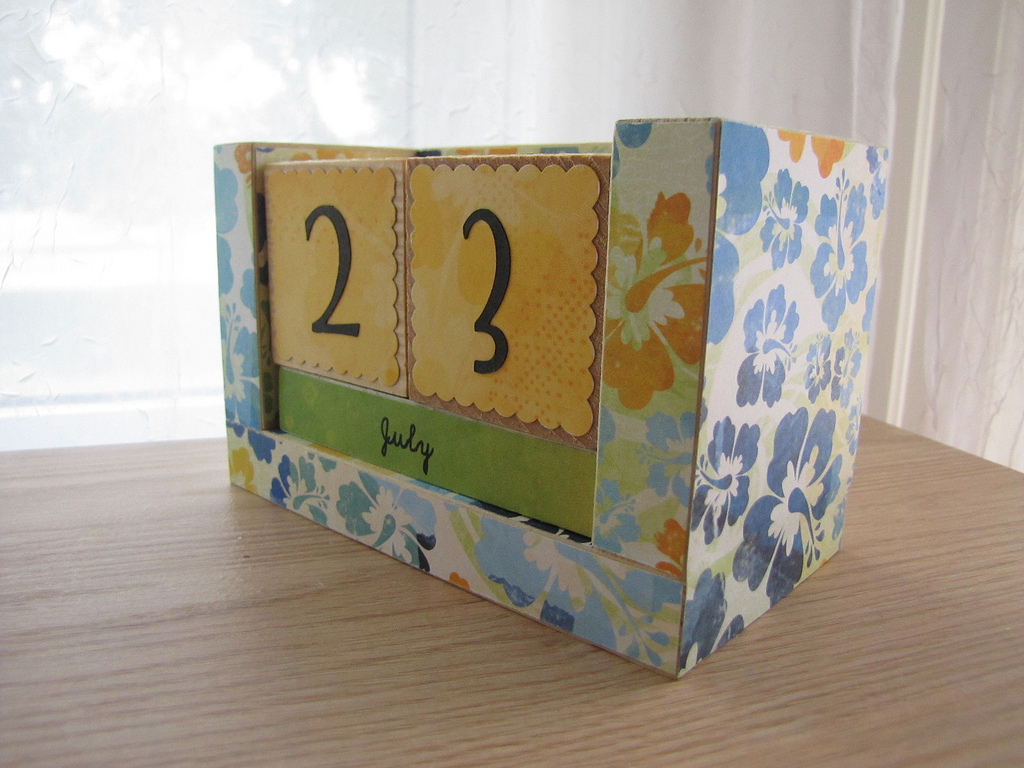
Handmade Perpetual Calendar
Instead of making or buying a new calendar with every passing year, many people prefer to have handmade perpetual calendar. These long lasting calendars can be of different designs, colors and can be made of simple available things. The only thing required is the creativity.
Today we will tell you how to make a simple but stylish perpetual calendar with an ease.
Stuff Required:
- Wooden Sheet 1 (0.5″ thickness is recommended)
- Wooden Sheet 2 (4″ x 2.25″ x 0.75″)
- Wooden Sheet 3 (2″ x 2″ x 4″)
- Saw (To cut the wooden pieces)
- Small brad nails (1 inch length)
- Hammer
- Wood Glue
- Ruler and Pencil
Instructions:
Preparation
Cut wooden sheet 1 into the pieces of following sizes:
- 1 piece of the size (4.125″ x 3.375″ x 0.5″) for back of stand
- 1 piece of the size (4.125″ x 2.125″ x 0.5″) for bottom of stand
- 2 pieces of the size (2.75″ x 3.375″ x 0.5″) for sides of stand

Cut wooden sheet 2 into the pieces of following sizes:
- 3 pieces of the size (4″ x 0.75″ x 0.75″) for month blocks

Cut wooden sheet 3 into the pieces of following sizes:
- 2 pieces of the size (2″ x 2″ x 2″) for days

Assembly
Attach the back of the stand to the bottom placing the lower edge of the back at the back of bottom by using glue and brad nails.
Attach the sides to the left and right edges of back and bottom assembly using glue and brad nails. After this your calendar holder is ready.
If you want to apply the feet under it then simply increase the height of the side wooden sheets from 3.375″ to your required height. any additional height from 3.375″ will serve as the feet of the calendar holder.

Finishing
If you want to decorate the wooden blocks then decorate them as per your liking either using some paint, stain or covering it by paper or cloth. Otherwise if you want to give a wooden touch to your calendar then just use the fine wooden sheets. It is recommended if you want to cover it with cloth then cover the wooden blocks before assembling the holder.
Apply the numbers to the cubes for days either by painting on them or applying stickers or writing with permanent marker or any other way which suits you. You can also sketch numbers on the cubes and then dig the numbers and at the end you can fill the hollow numbers with some material like colored wax etc.
Both days blocks must be numbered as follows:
- One block must have numbers 0, 1, 2, 3, 5, 6
- Other block must have numbers 0, 1, 2, 4, 7, 8
Number 6 will also serve as 9 and hence any combination of numbers from 1 to 31 can be made.
Similarly label the Month blocks as you did with day blocks. You have 3 month blocks with 4 surfaces and hence 12 months can be labeled at all 12 surfaces.

Notes
You can further customize the design as per your needs and requirements. You may also add a section for year. This type of handmade perpetual calendar can be a useful gift at any time of the year.


Comments are closed.