Replacing a Broken iPod Touch Screen
The iPod Touch is an advanced portable media player – and one of the most popular in today’s market. However, iPods are known for their fragility and the iPod Touch is no exception! The front panel is completely covered by a thin pane of glass, and one small accident can lead to an expensive repair bill.However, there is another in-expensive option; repair it yourself! This, as you can imagine, is not the easiest option – but when faced with costly repair bills is the most economical. This does involve lots of delicate parts, so set-aside a few hours to complete this task as to avoid rushing and potentially creating more problems.
Accessing the Broken Screen
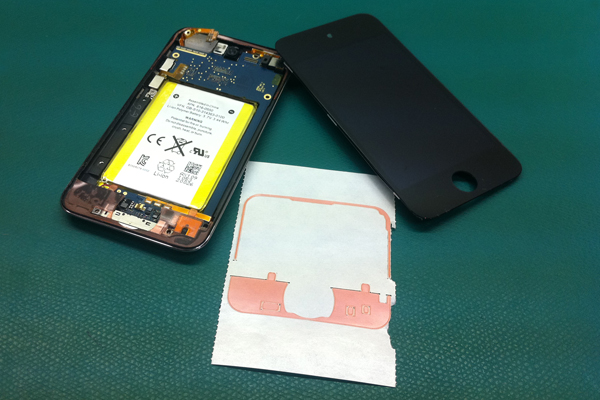
To begin, the case needs to be opened. This requires an opening tool (plastic reduces the risk of chipping) and a decent amount of force. Slide the tool between the front-plate and metal backing and wiggle up and down one side until loose. Continue this process around the iPod until the back panel is fully separated. After that, the battery needs to be removed. However, it needs to be done carefully as there are routing cables underneath. Place the iPod face down; the battery is glued to the main body, so expect it to take some time and effort. Once completed the logic board needs to be detached. This is secured with four screws – remove these carefully as the headphone jack is attached to the board and store the screws in a safe place.
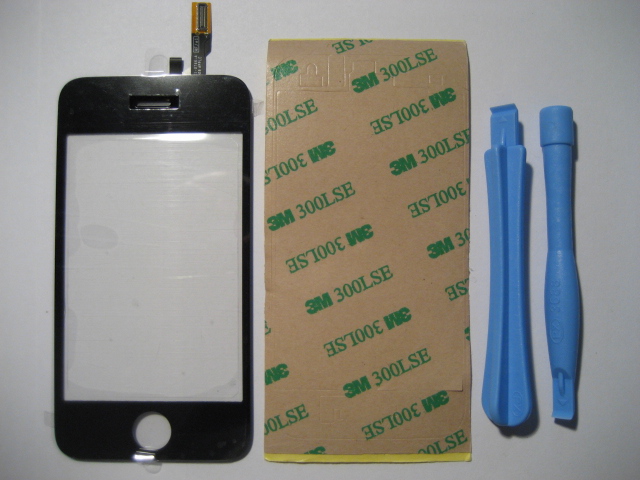
Digitizer Adhesive and Plastic Tools
After you have successfully removed the battery and logic board, peel the orange tape which will reveal sixteen screws. If you hadn’t already guessed, all of these need to be removed. Gently lift the display panel to separate from the front-plate. The front panel is held together by heat sensitive glue which can be easily removed through exposure to heat. A hair-dryer works well for this. Be wary when heating the panel as it will become hot; use gloves or a cloth when handling! With a similar tool to the one used in the first step, separate the face-plate from the cracked screen. That’s the hard bit done! The final steps involve laying your replacement screen over the face-plate and using your heat source to bond the adhesive. So, the question is which adhesive to use?
Choosing an Adhesive
There are many types of instant adhesives available, but when choosing for this type of project a number of factors need to be considered; is it durable, is it thin enough, is it water-tight. There are two types of adhesive advised; optically-clear adhesives (OCA) and liquid optically-clear adhesives (LOCA). These adhesives are generally used in touch panels, computers and LCD screens due to their lightweight and ultra thin properties. Both provide a similar result; the main difference being that the OCA is a tape adhesive while the LOCA, as the name suggests, is liquid based. The LOCA is subsequently size-independent while the tape will need to be pre cut. However, the LOCA can be messy if applied hastily and is generally more expensive than the tape option. Both provide a strong, durable bond – it simply depends on one’s personal preference. Most adhesive suppliers will stock these, so they will not be hard to find.
Changing iPod Screen
Once the adhesive has set, replace all the parts in reverse order…and hey presto; a crack-free screen for a fraction of the price.


Comments are closed.